Related Tags
DIY Workshop: How to fix the tuners on your Les Paul
Having tuning issues with your Les Pauls? We take a look how you might replace the tuners on and get your guitar in tune.
A common and historical complaint from guitar players fortunate enough to own a Gibson Les Paul is that of the Kluson tuners. This divisive topic still floods forums, with many asking which tuners to go for: Gibson’s Klusons or a competitor. Many deem the Kluson to be the better tuner and have had no issues with them. I, on the other hand, have.
- READ MORE: DIY Workshop: How to fix a faulty jack
Players have long sought other brands such as Schaller and Grover to aid tuning issues. The great debate as to whether or not swapping tuners devalues your instrument is something I have no issue with – I like guitars to stay in tune and a faulty set of tuners is a complete no-go for me. It would seem Peter Green, Eric Clapton, Paul Kossoff and many others have had cause to replace their tuners too.
In this article, I’m going to show how to change these standard tuners yourself. The job requires a small amount of tools and, as always, a little patience.
You will need:
- Flat surface with a towel or foam mat
- Tapered handheld reamer
- 7mm allen key or similar
- Handheld countersink
- Small plastic tub
- Small screwdriver set
- Soft cloth and masking tape
- Small adjustable wrench or MusicNomad wrench
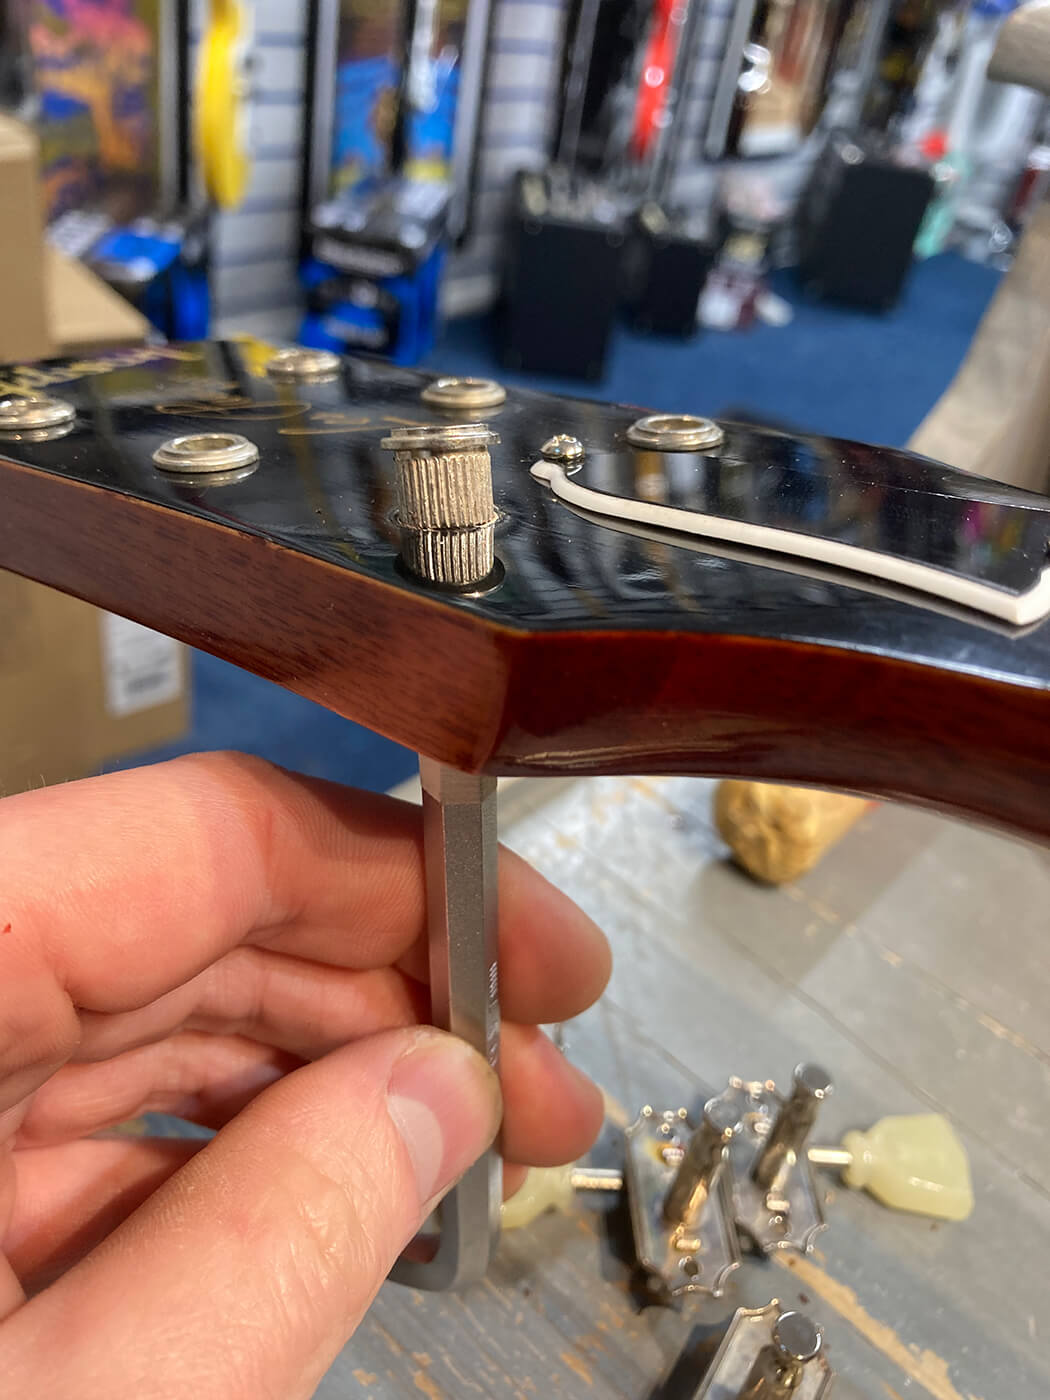
As Kluson machineheads are slightly different in shape to other brands’, the holes for each tuner will need to be widened at the back of the headstock, meaning you will need a tapered reamer to carefully remove the wood.
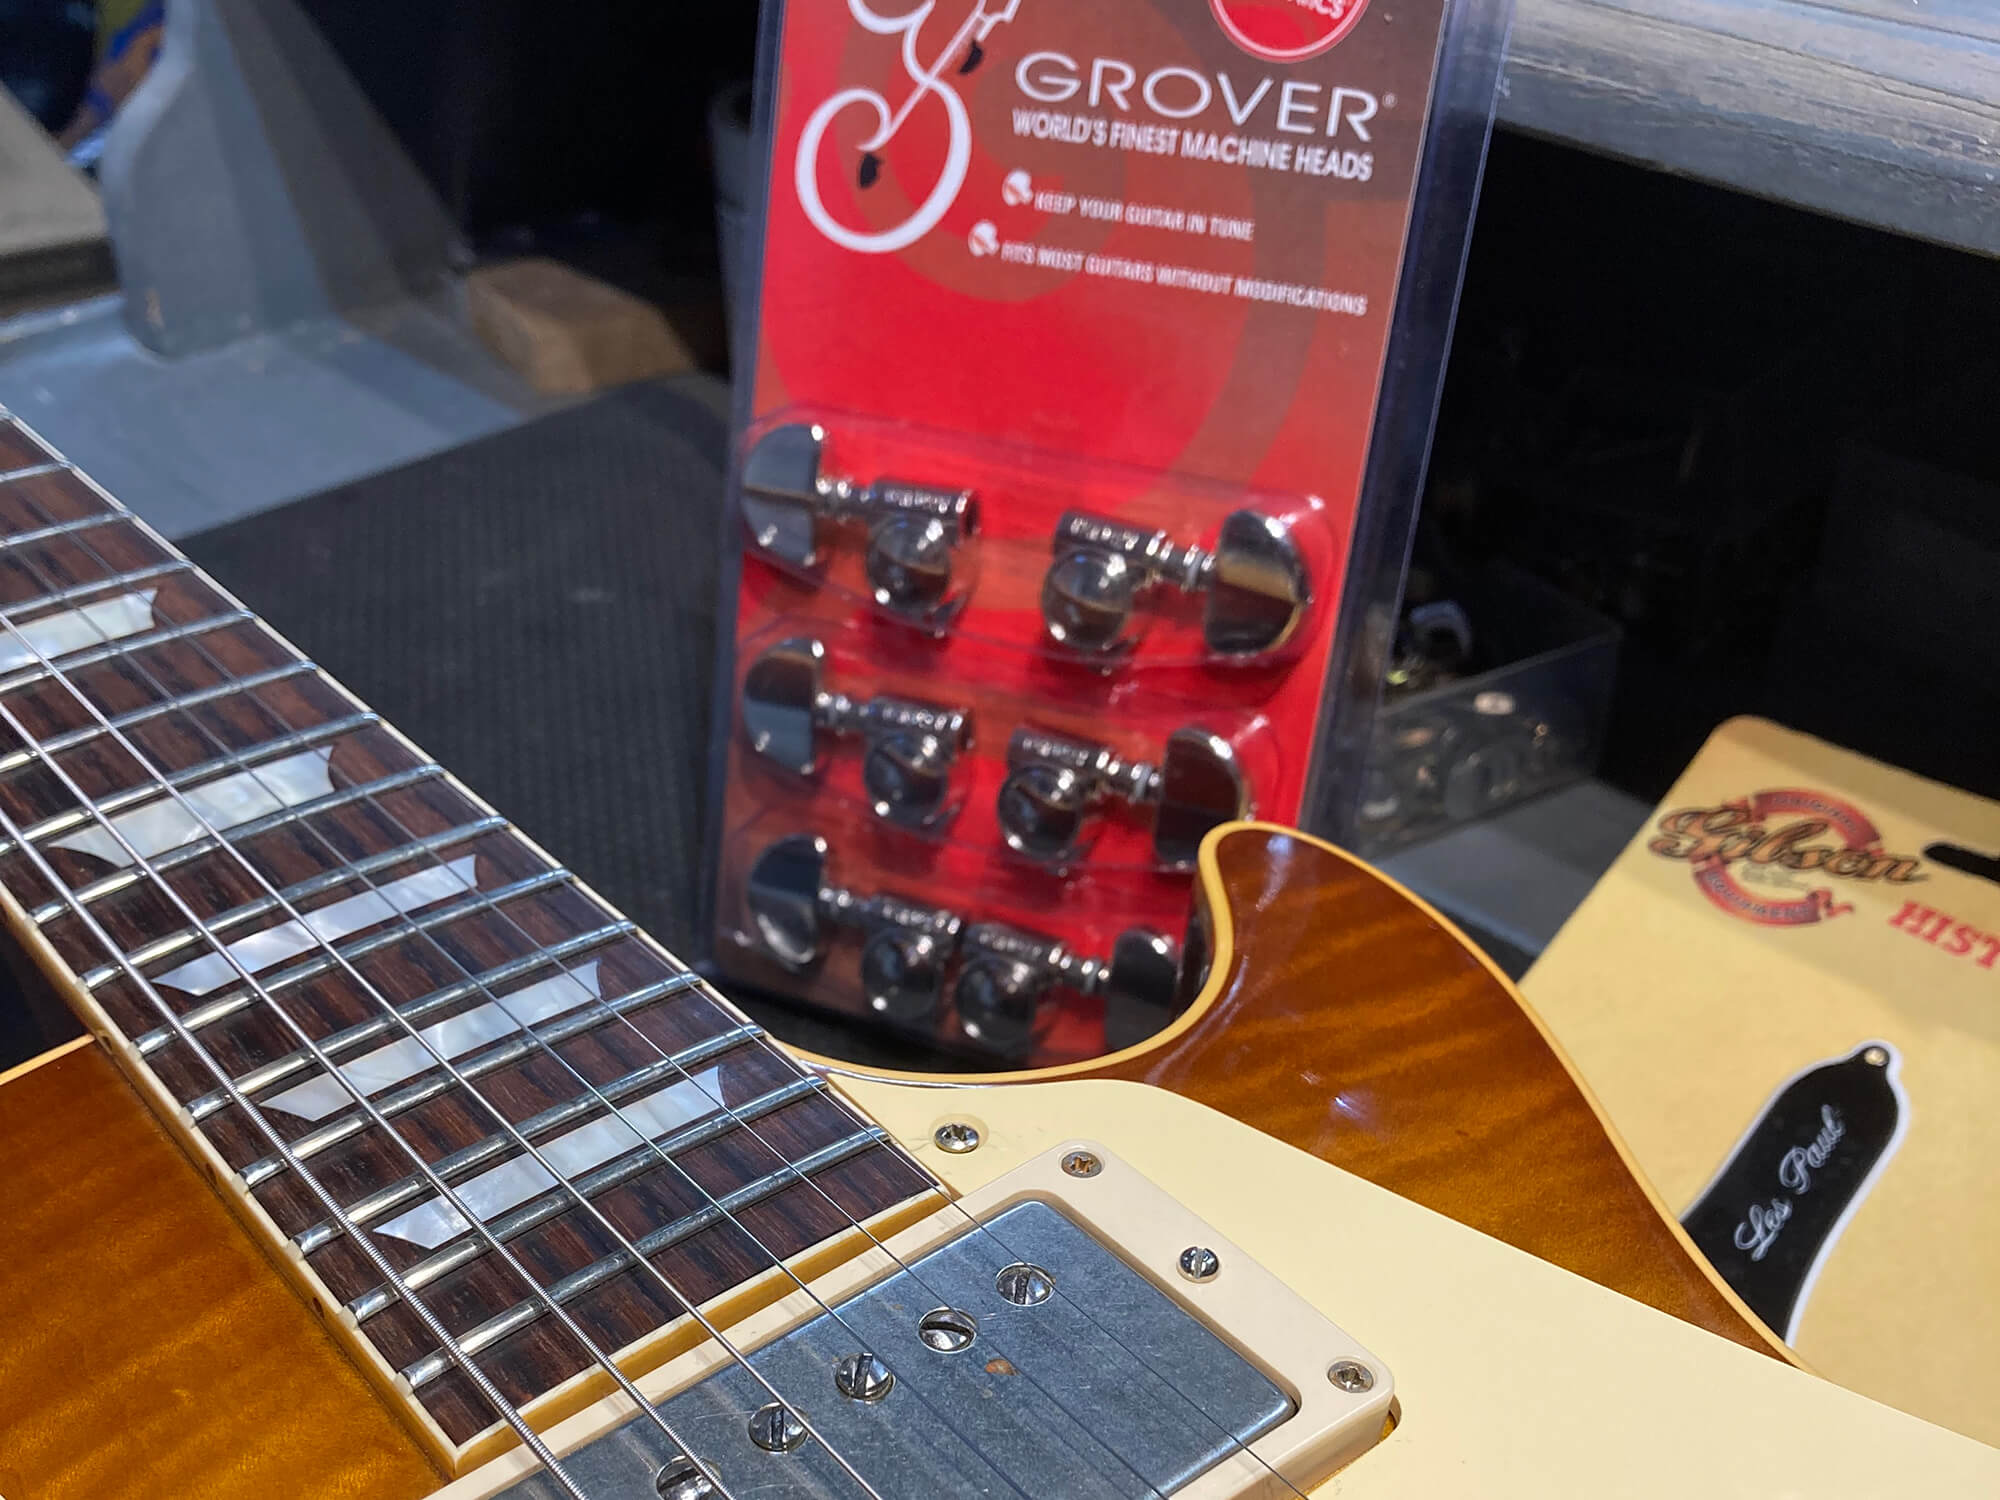
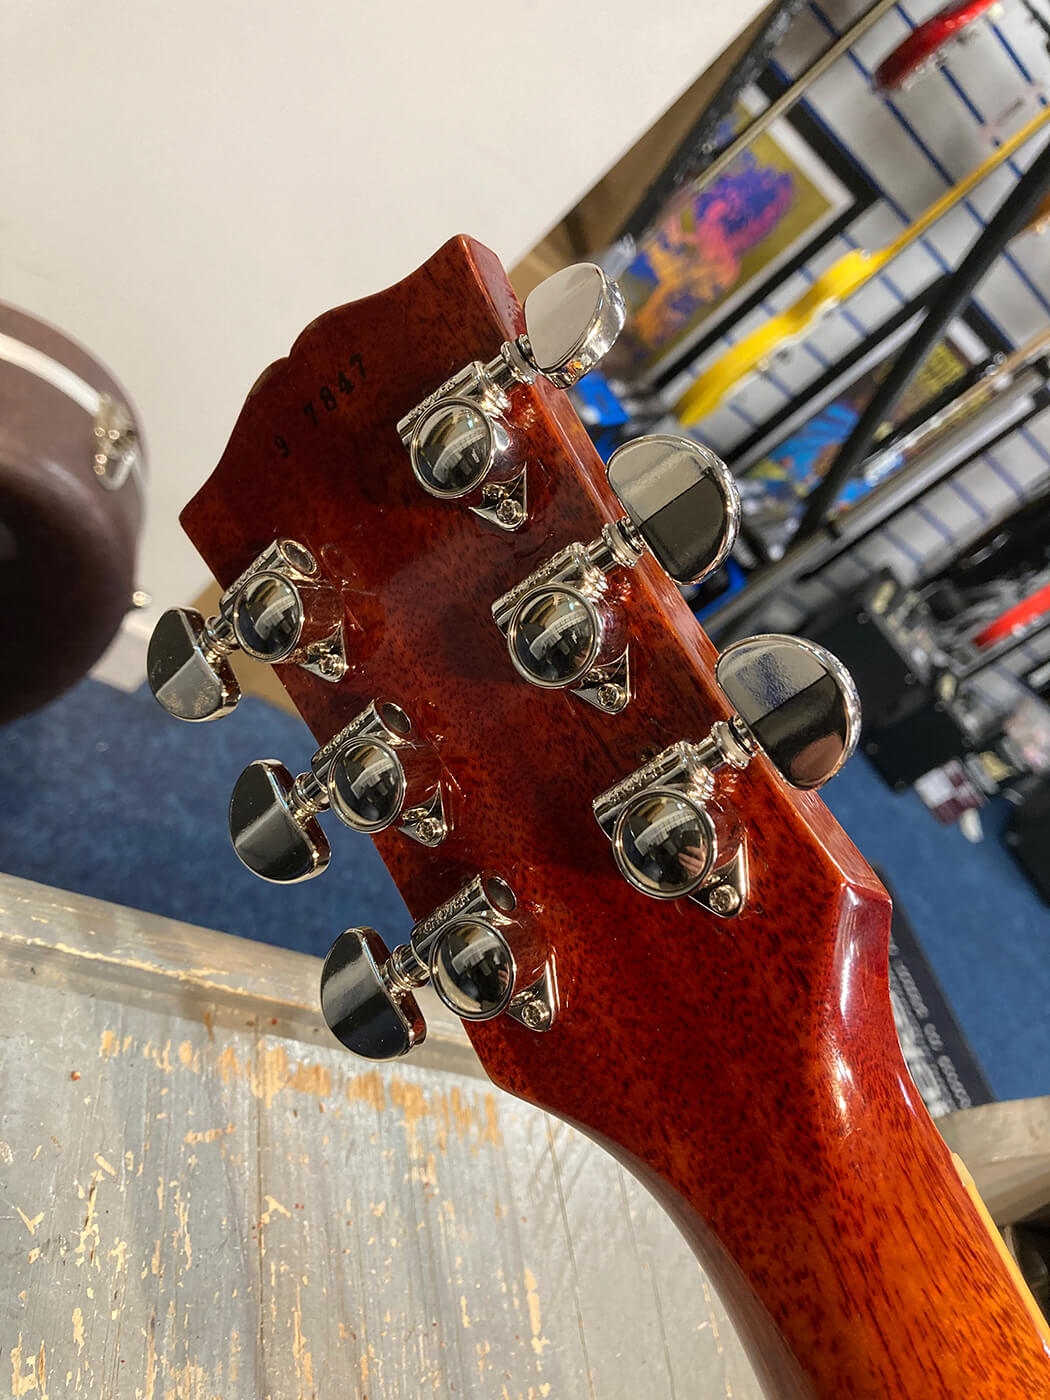
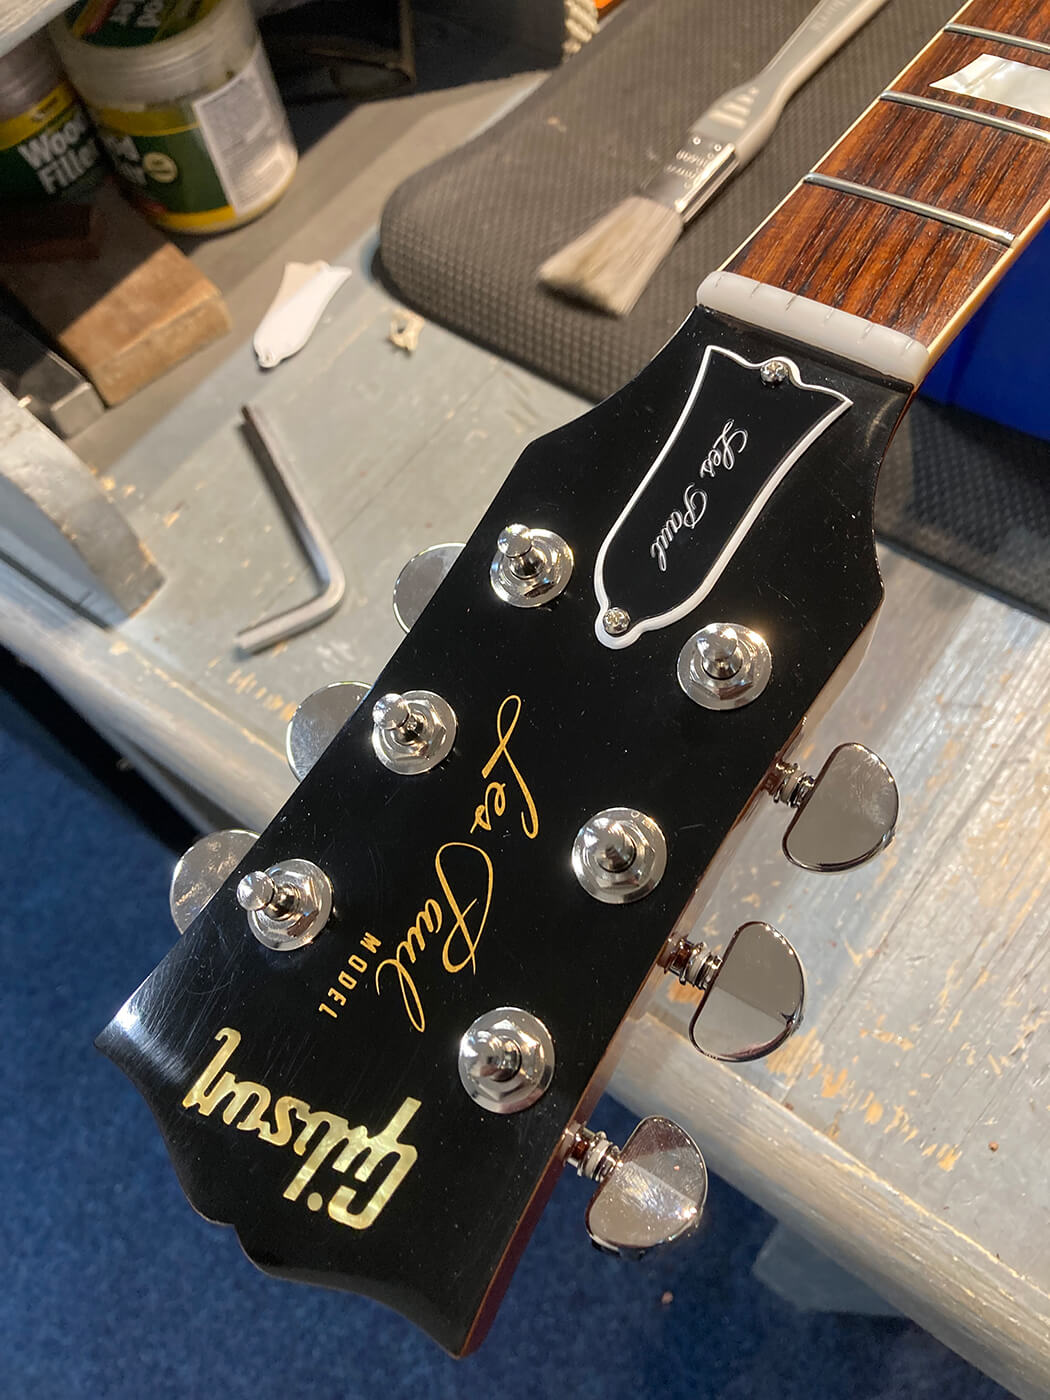
I’m using my own Gibson R9 for this job, and have bought a legitimate set of Grover Rotomatics to make it slightly more Mike Bloomfield-esque (hence the truss-rod cover) and, of course, allow better tuning and string-post winds.

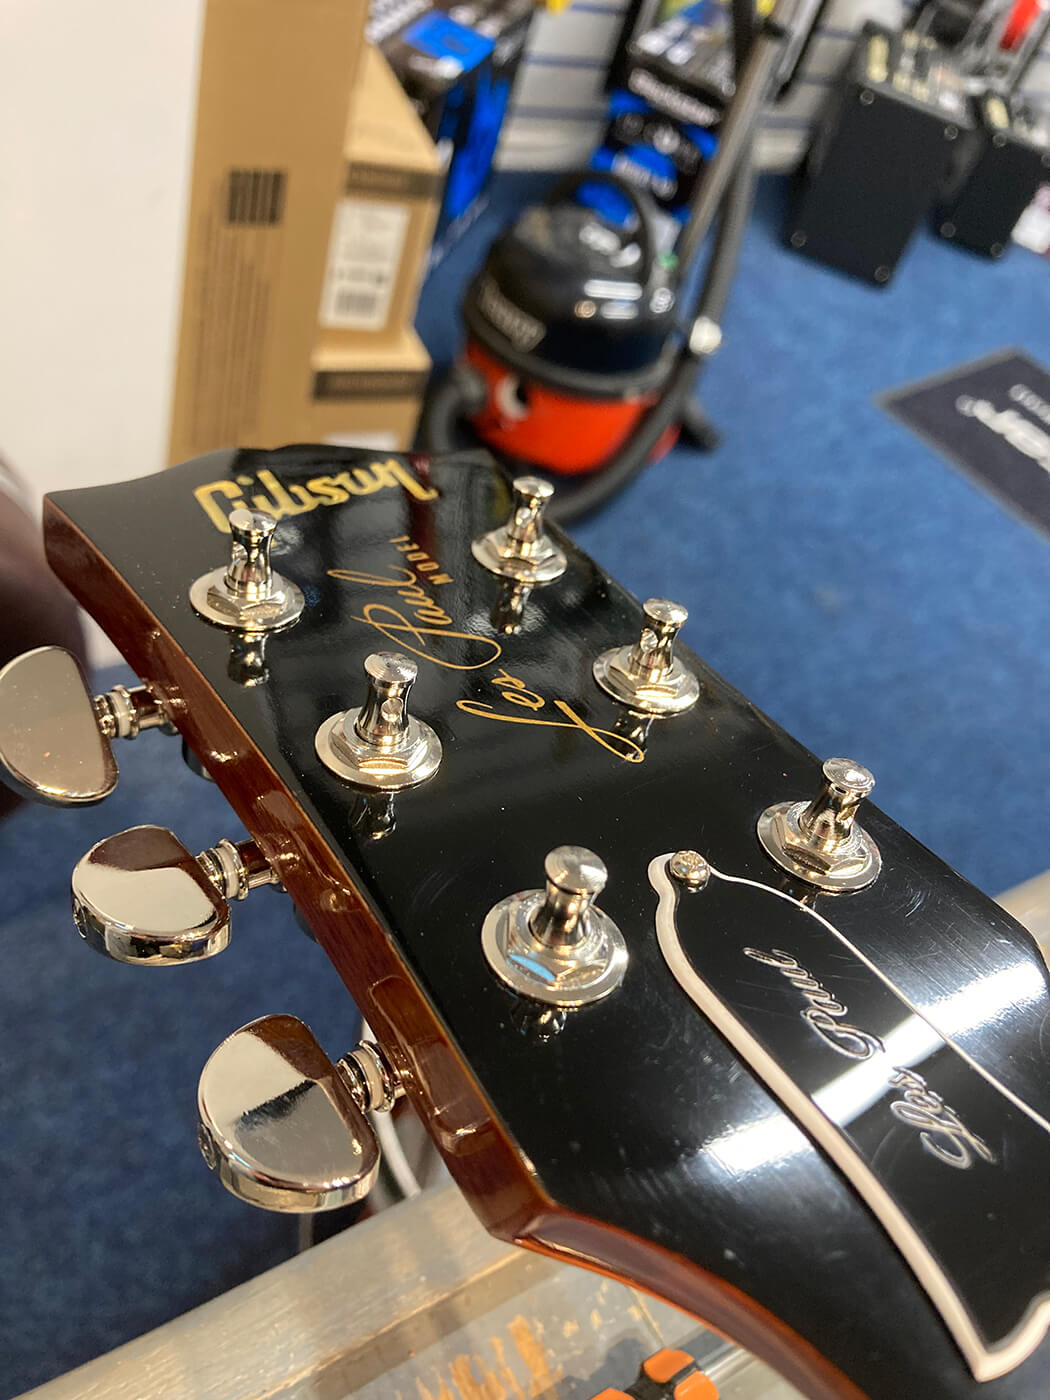
Many Gibson guitars feature Grovers as standard these days but Klusons are the most iconic tuners for Fender and Gibson guitars. I have struggled with Klusons on Gibson guitars, with a number of them failing.
Another thing about Klusons is that the posts allow for no more than one comfortable wind of the string on the low E for my preferred gauge, which inherently causes tuning issues.
Before we go any further, do not reach for the drill on this one – leave it in its case. Firstly, make sure you’ve got a good flat surface with a towel or mat to work on, and keep the neck supported.
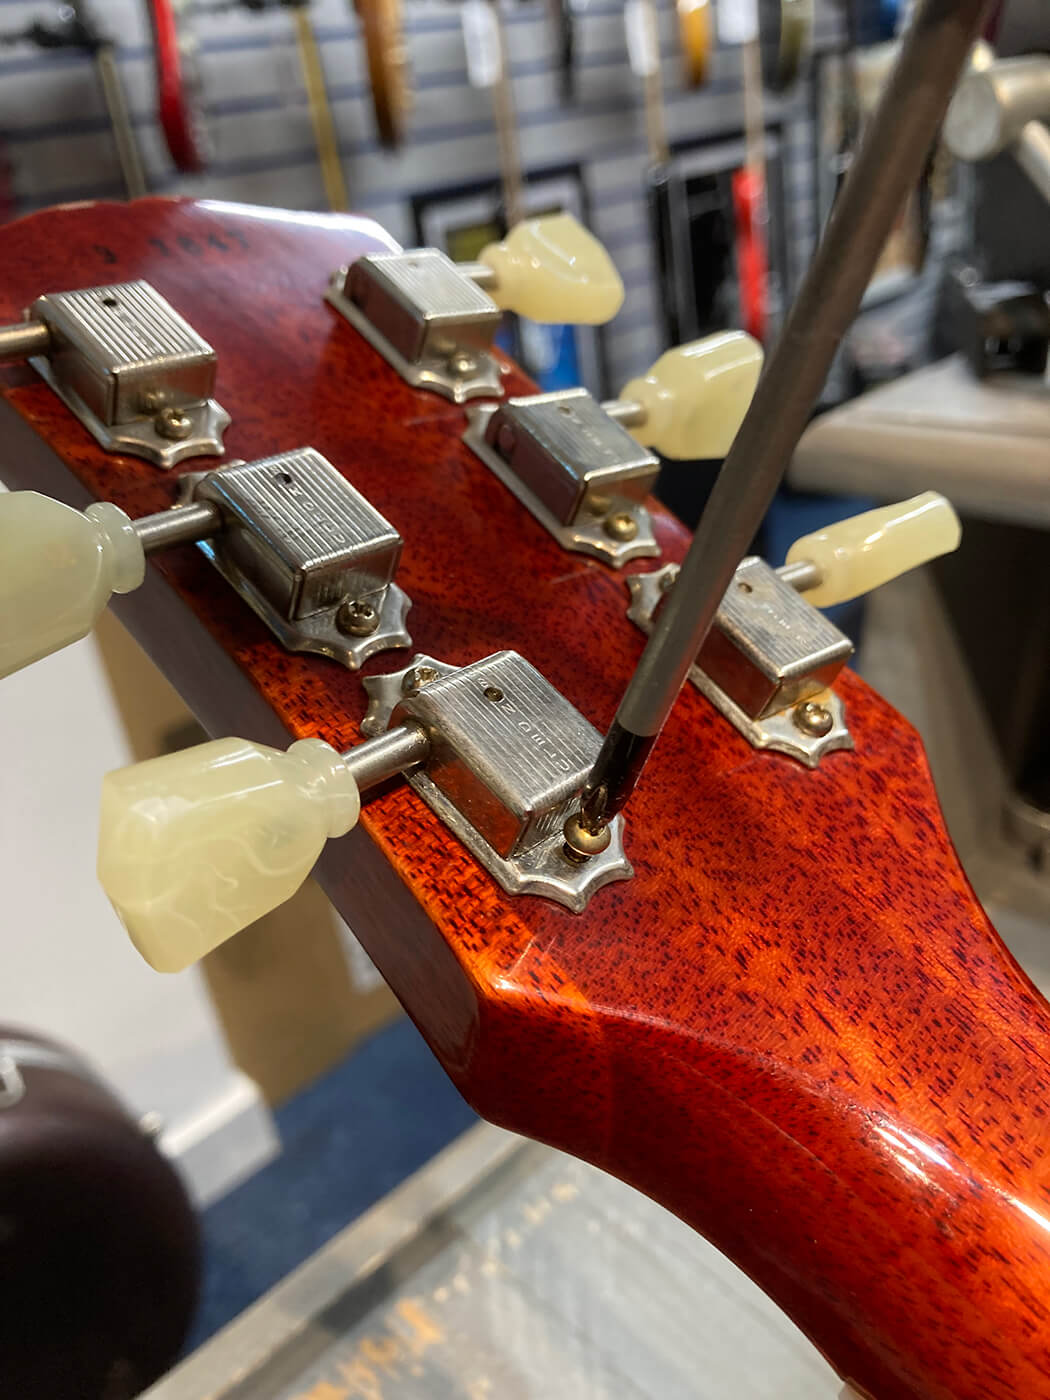
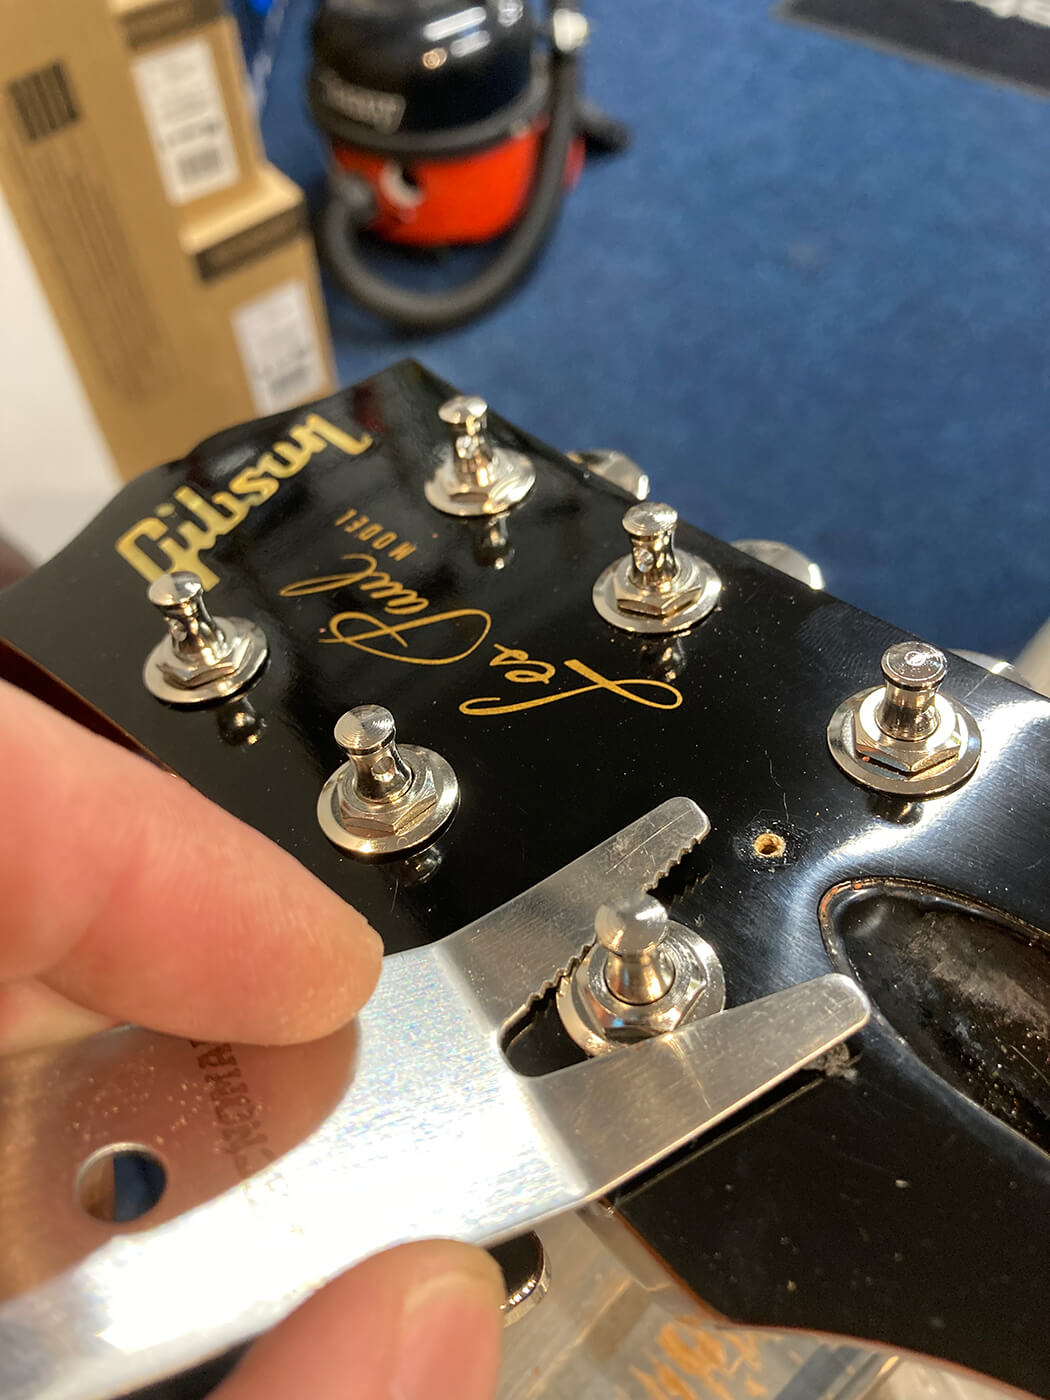
Remove all strings and safely store any loose hardware such as the bridge. Unscrew all the small screws holding the back of the tuner to the headstock and store safely away from the guitar. Use a clean takeaway tub to keep these parts together.
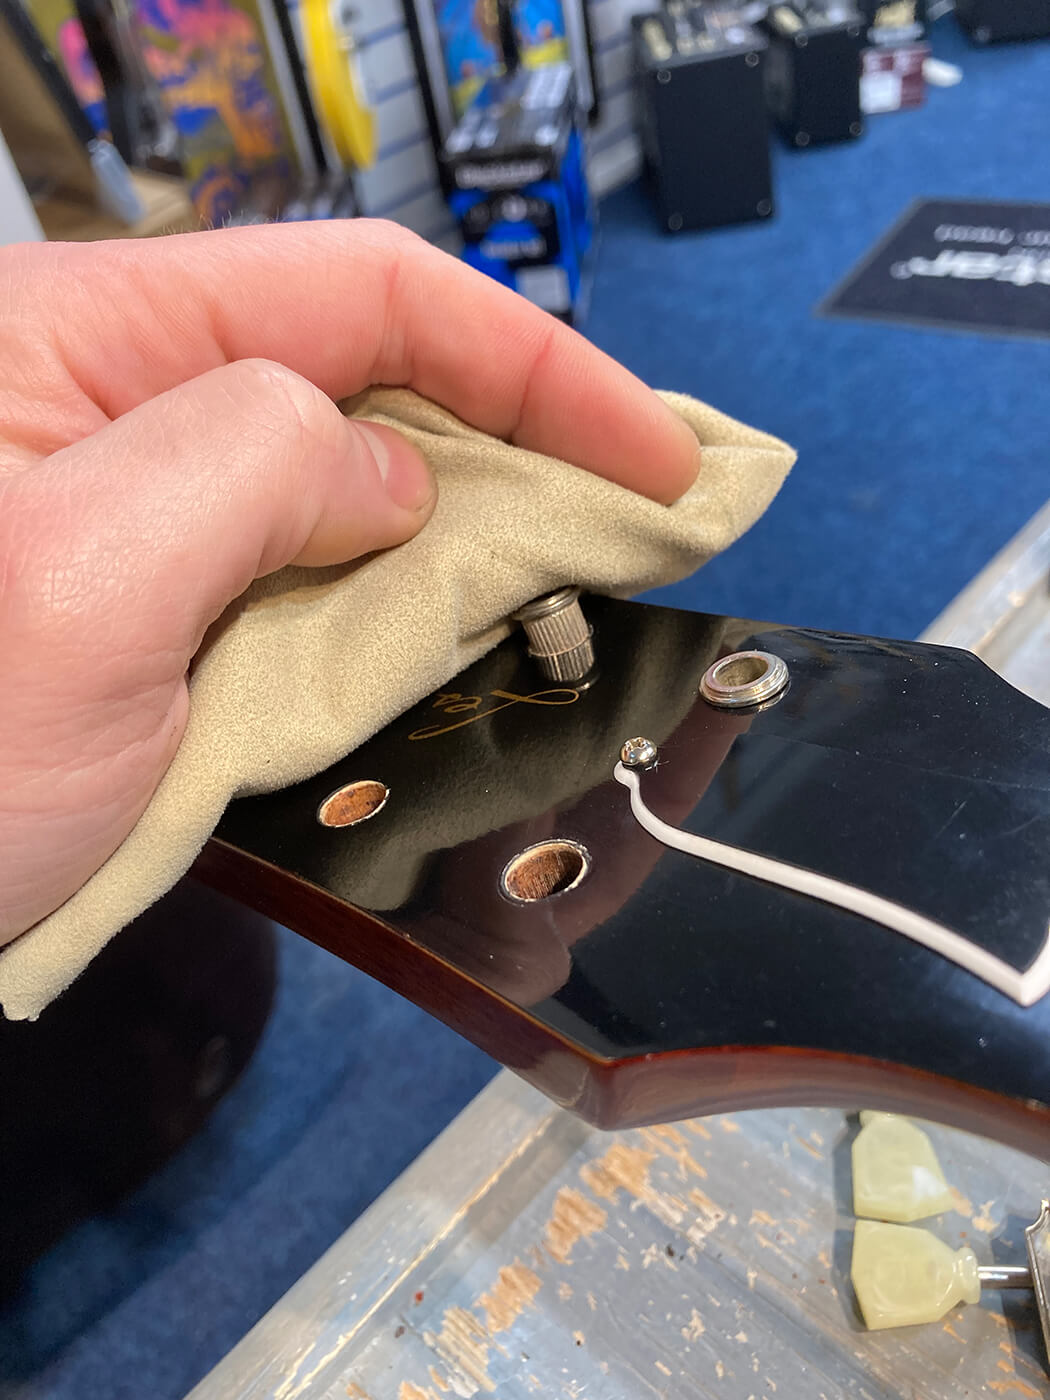
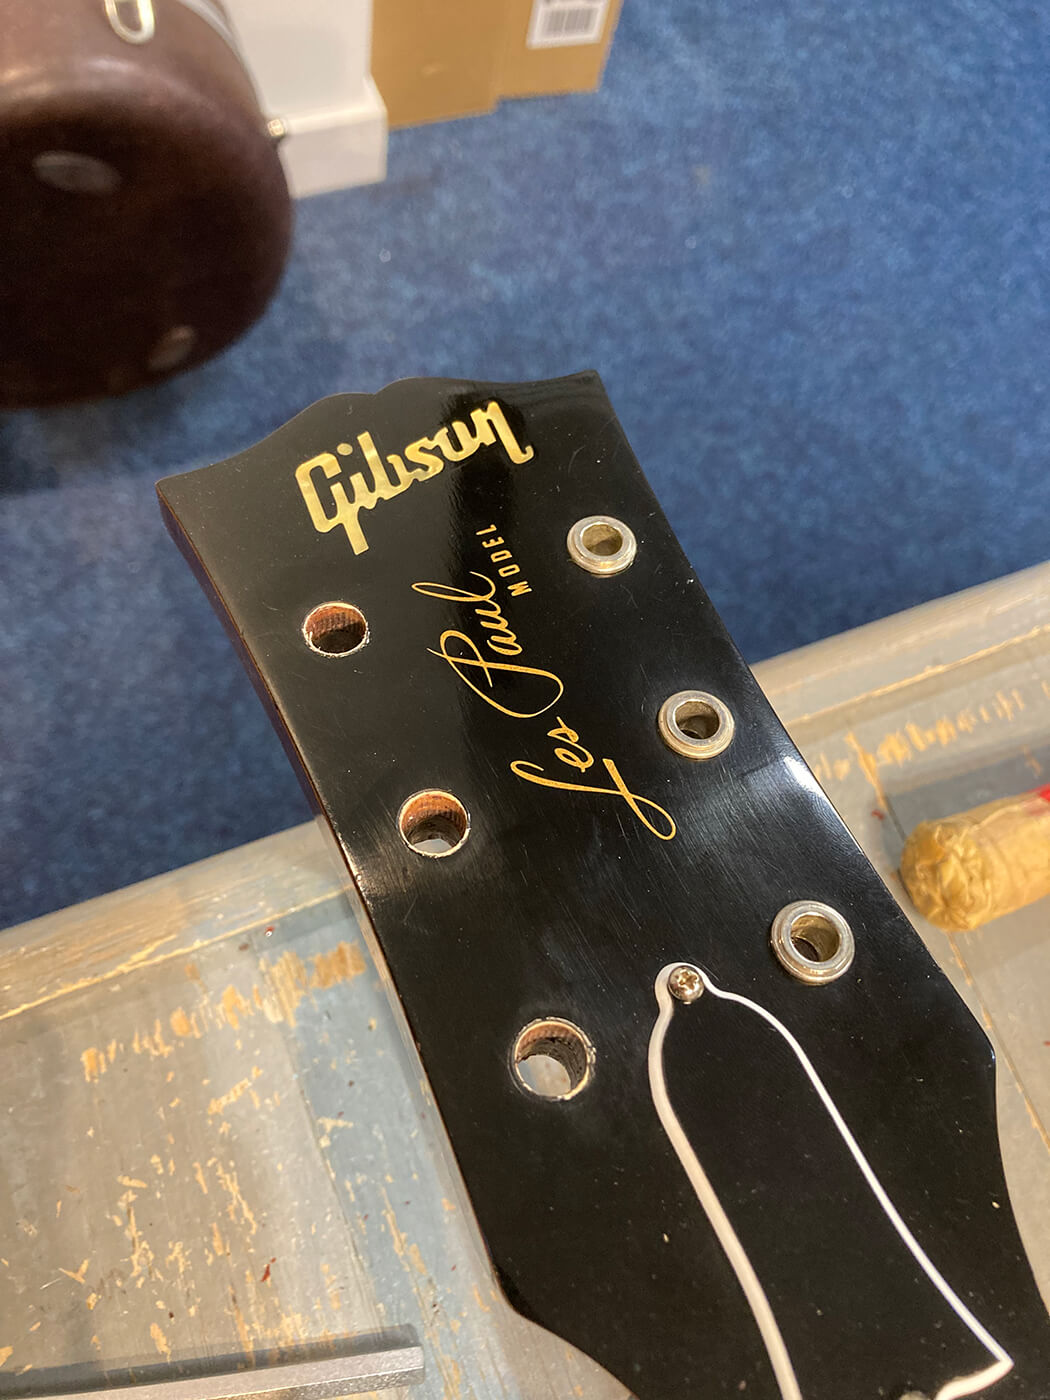
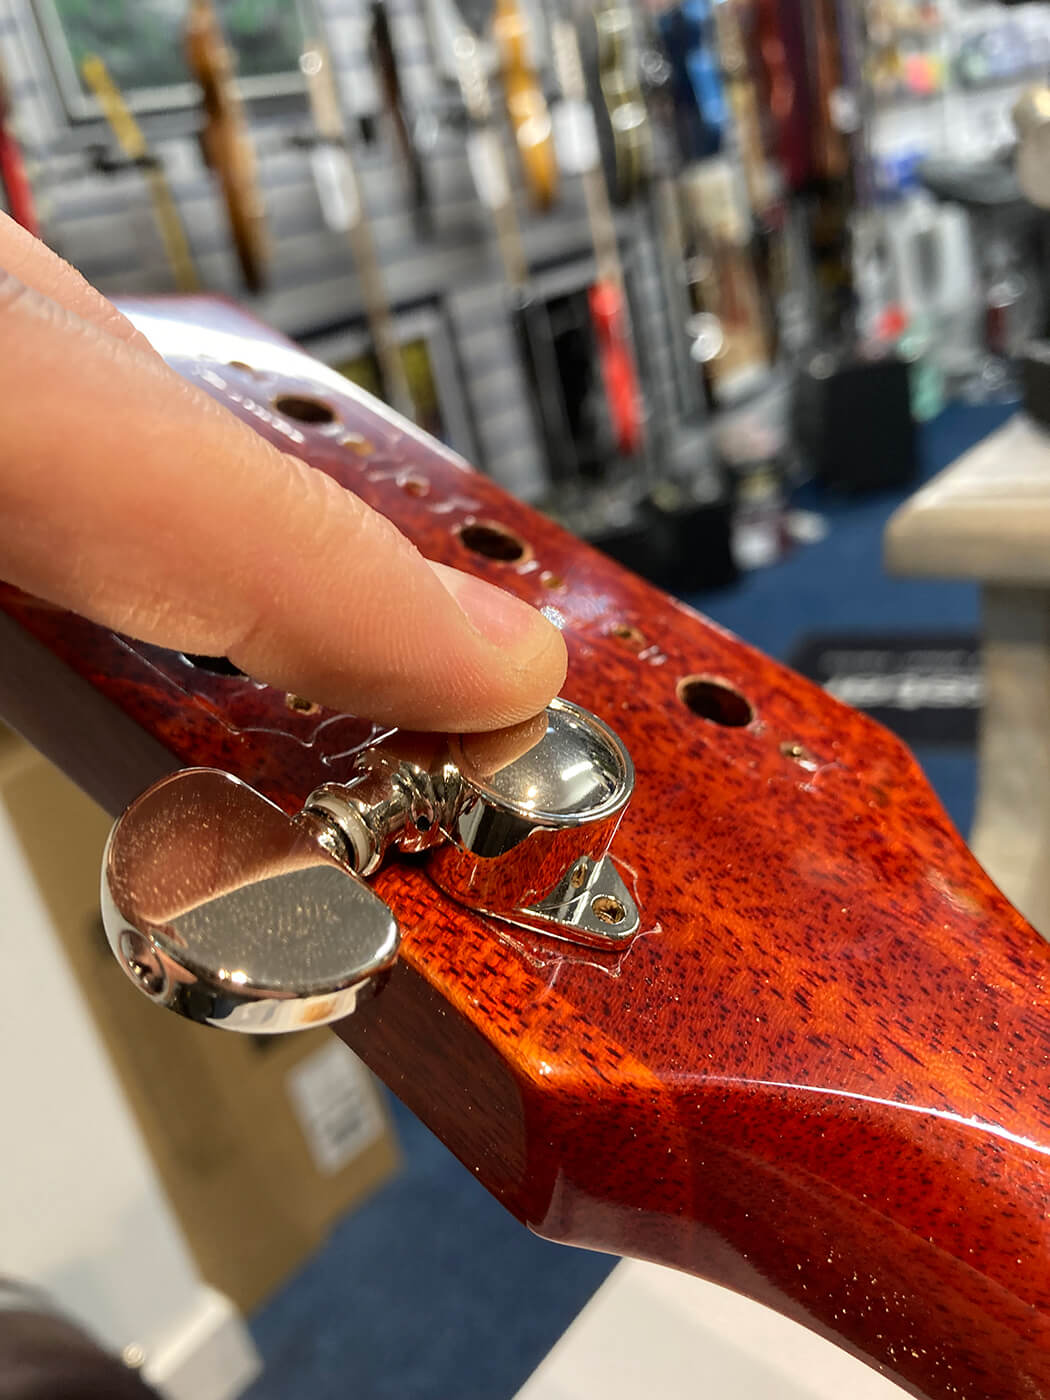
Once all the hardware is off the headstock, remove the ferrules on the front of the guitar’s headstock. The safest method to remove these is by hand, with a bit of pressure, ensuring you don’t damage the guitar’s finish.
For this guide, I’ve used a 7mm allen key with a small amount of tape on the end to press the ferrule through the back of the headstock. Do not be tempted to hammer the headstock on the back, as you can cause splits and seriously damage your guitar.
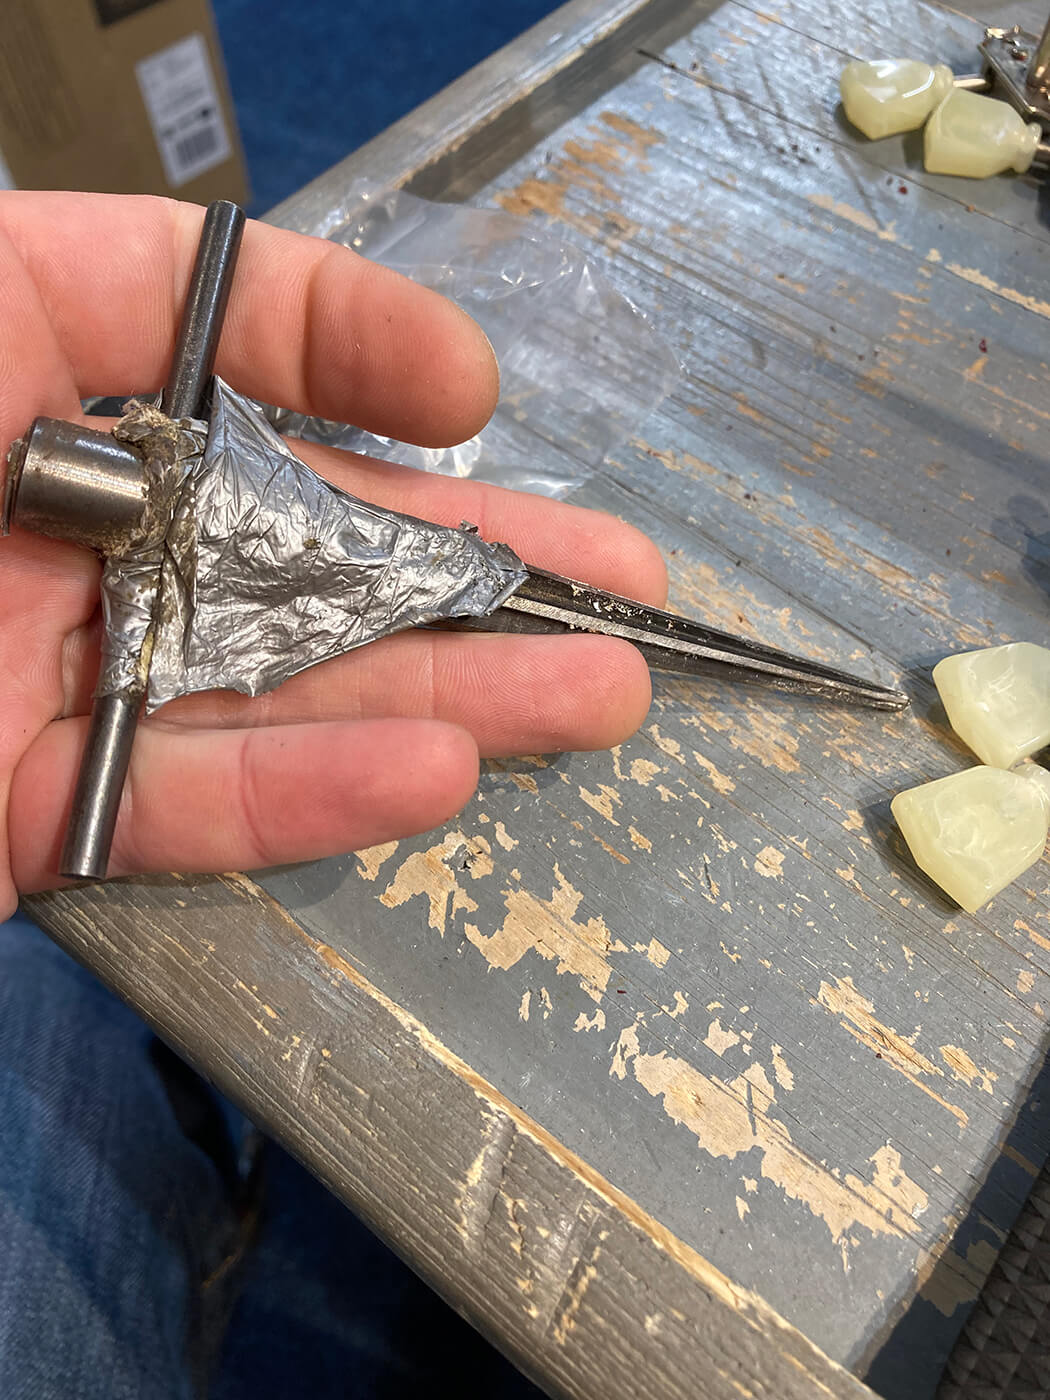
Lay a cloth or masking tape on the front of the headstock ferrules to ensure that they come out safely once force is applied to the back with the allen key. Be sure to push the ferrule out with a bit of force, and check each as you go.
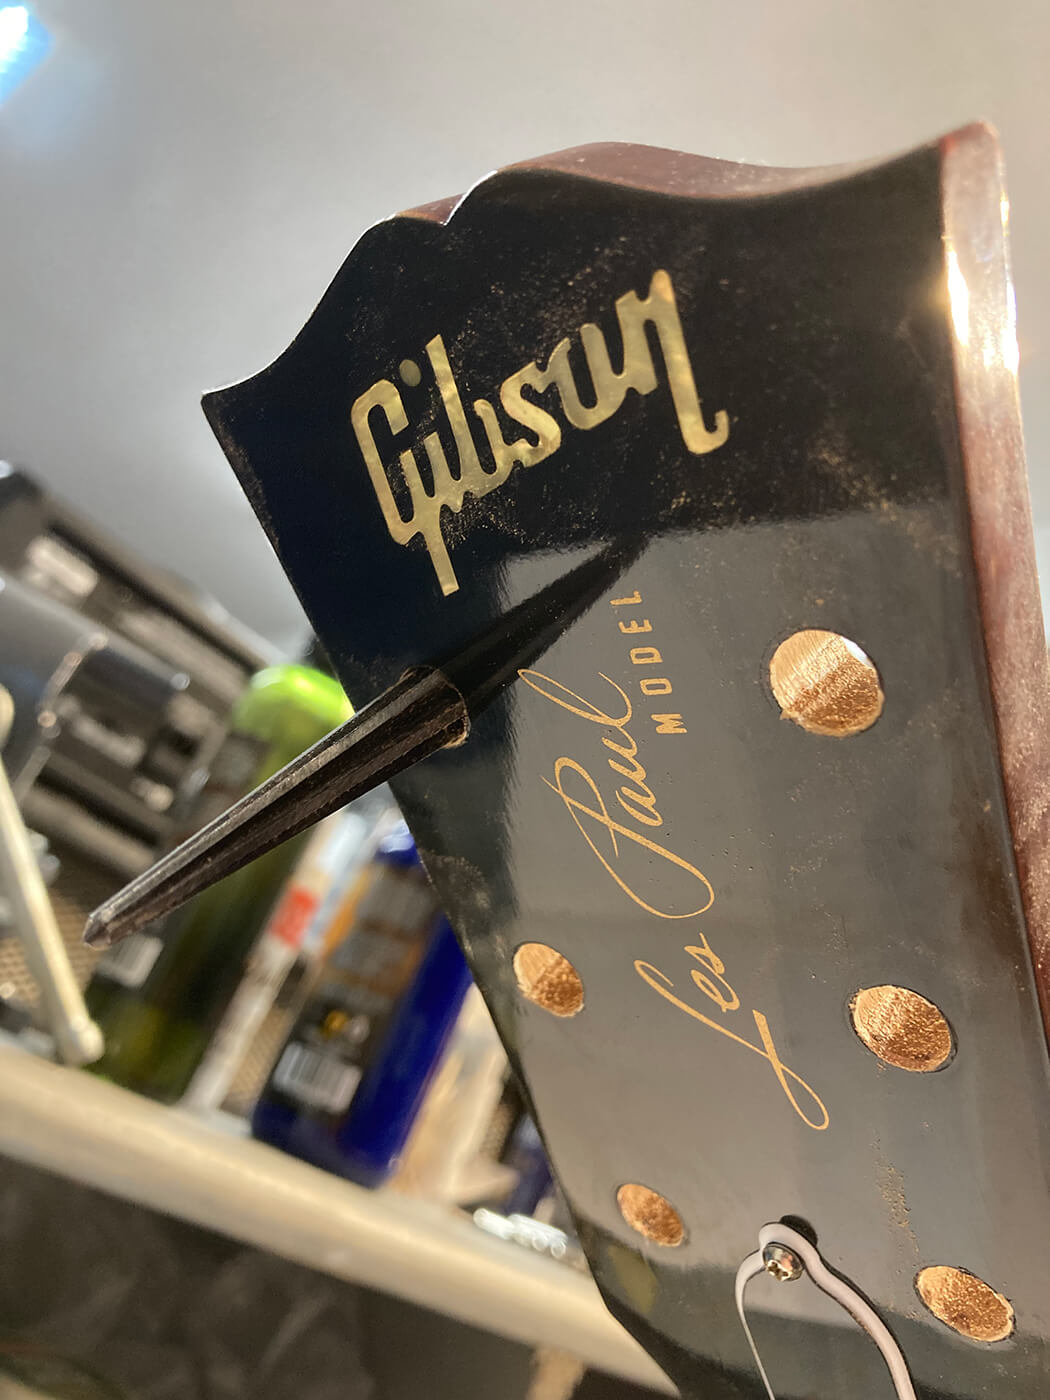
Once all the ferrules have been pressed out and the hardware is stored, flip the guitar back over and inspect the holes in the back.
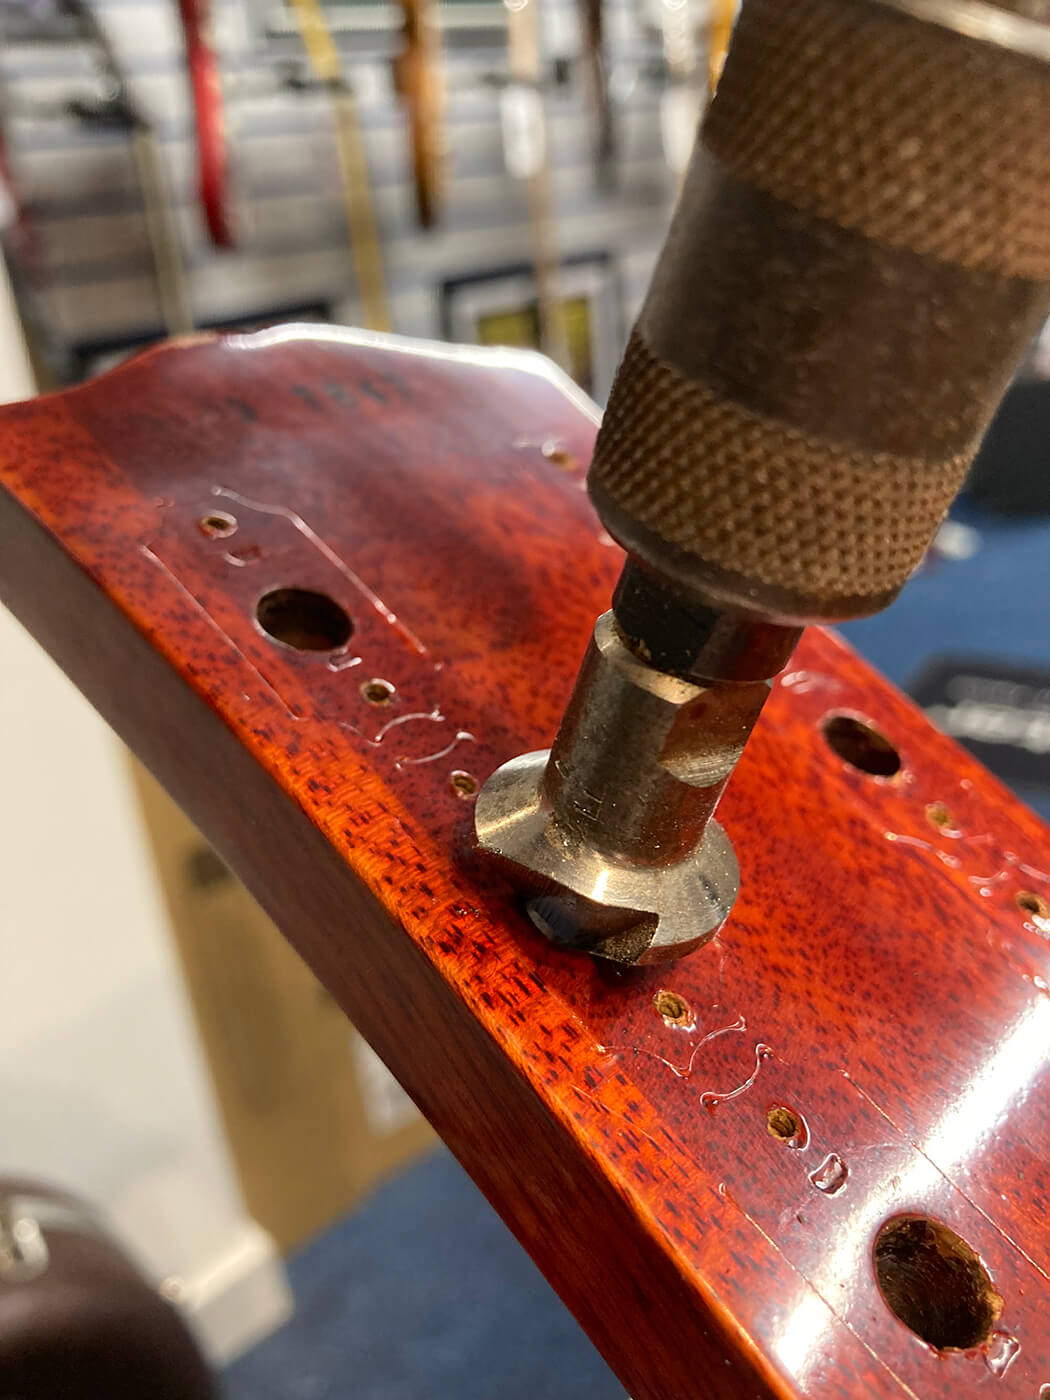
Using a handheld countersink tool, carefully cut the fine layer of finish around the hole. Be gentle to avoid splitting the wood or finish, and use very little pressure on the back of the headstock.
Once the hole-widening process has begun, take the tapered reamer and slowly twist it clockwise. Be mindful of how much wood is being removed and take your time with each. Patience will pay off.
After you’ve removed a fair bit of wood from the back, check it periodically with a machinehead to see if the hole has become wide enough for it to fit.
If it has, the tuner should sit flat on the back of the headstock. If it doesn’t, ream a little more wood out and it’ll soon fit comfortably. Again, patience.
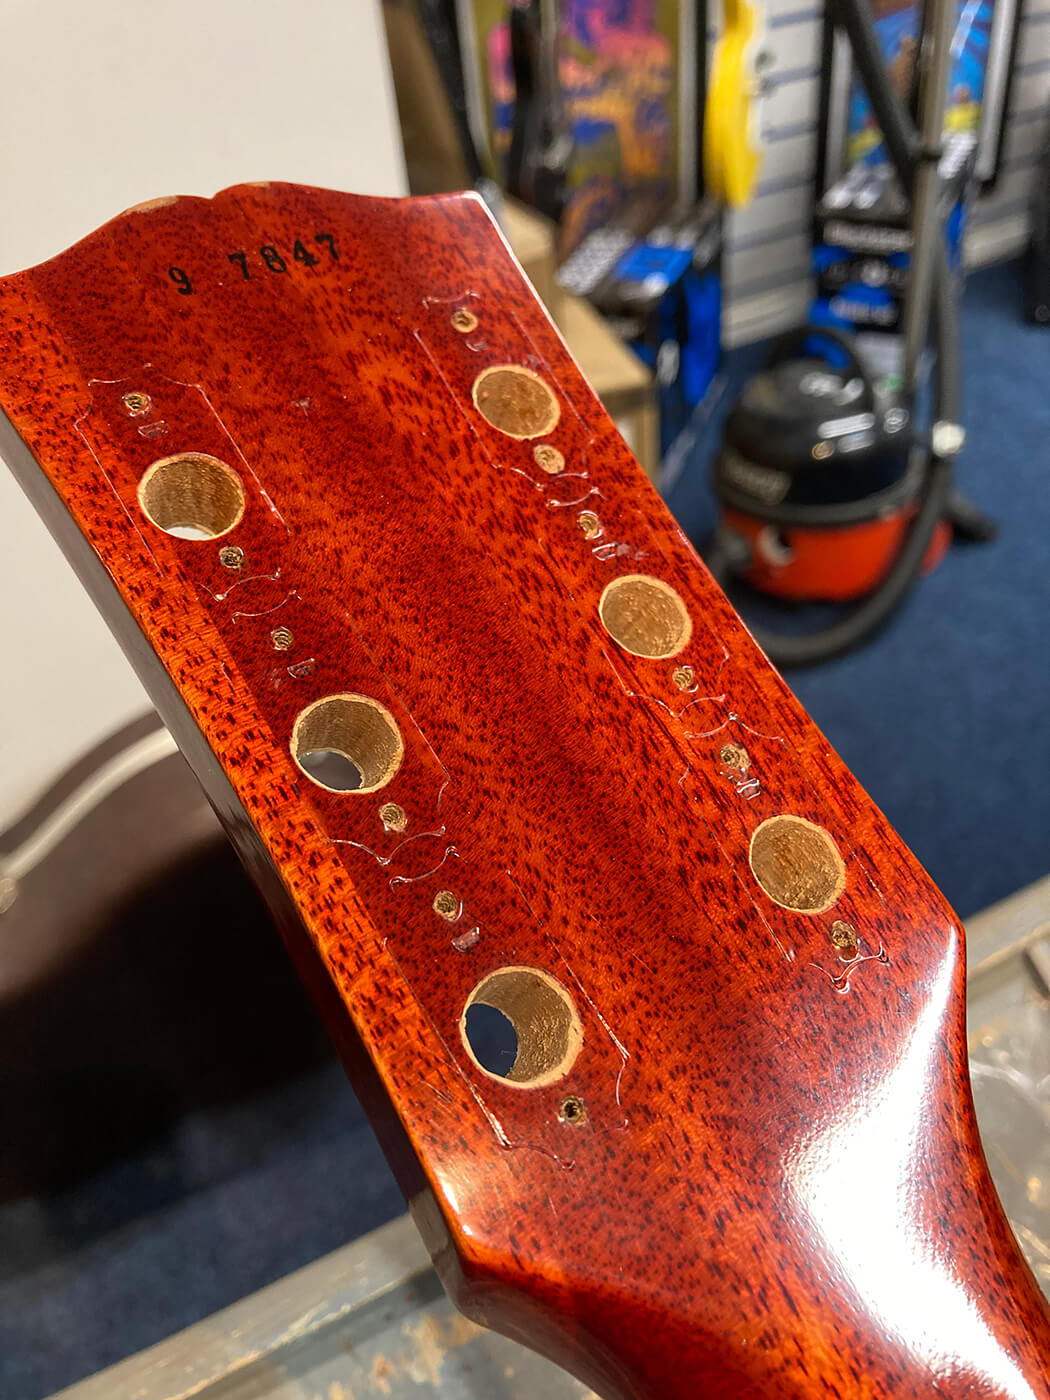
Once all the holes are big enough to accommodate the new machineheads, use the hand countersink to tidy up the holes. This isn’t essential but will ensure a neater finish.
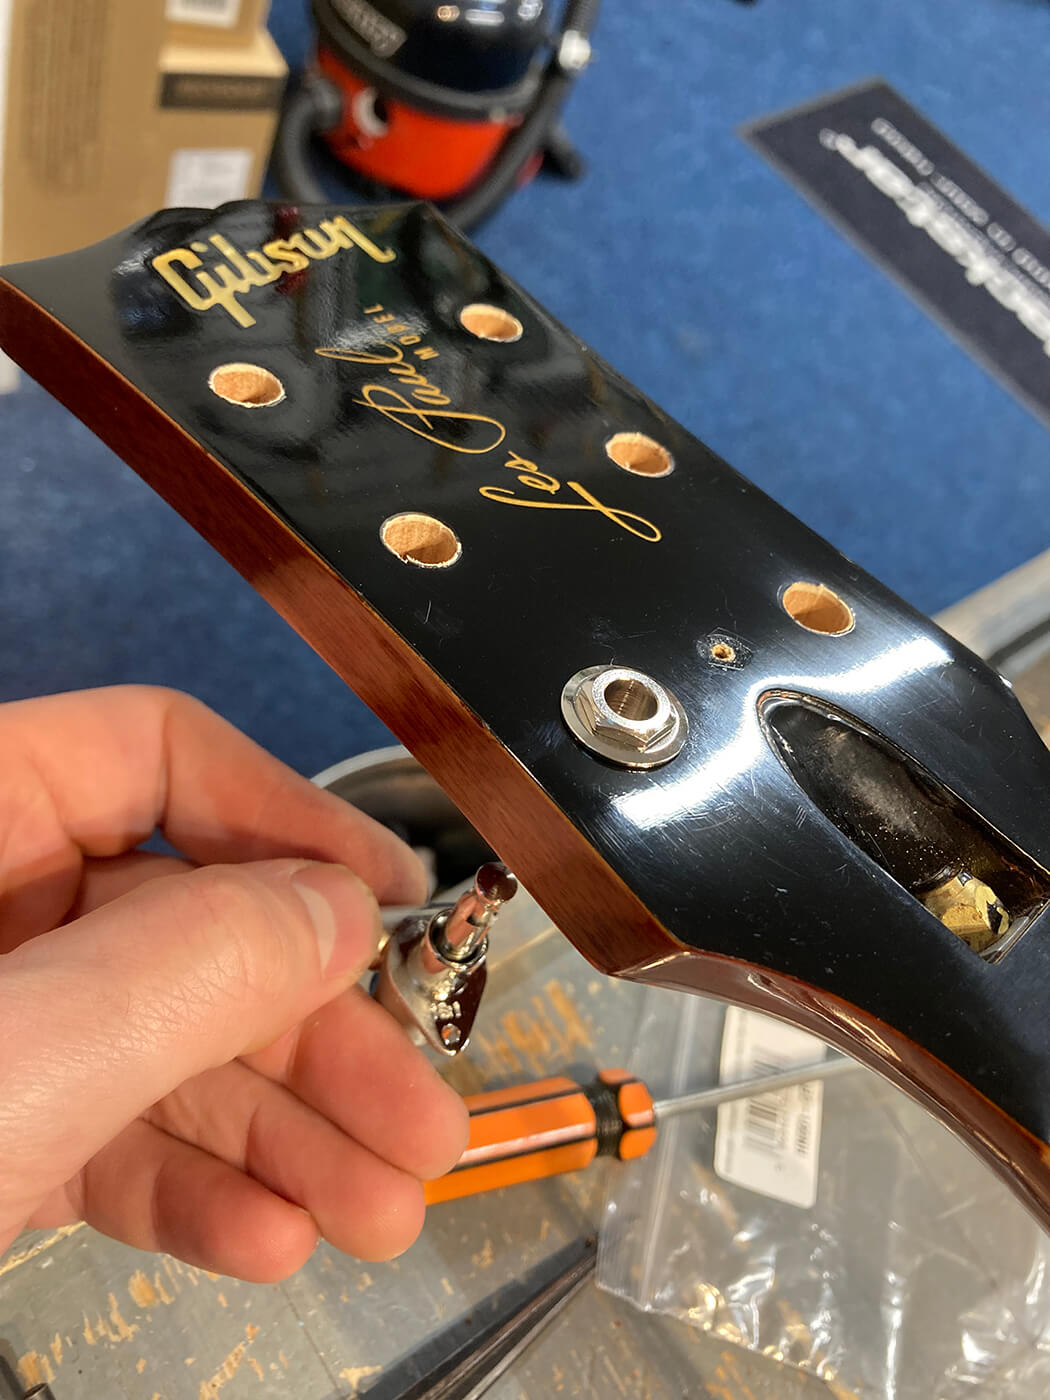
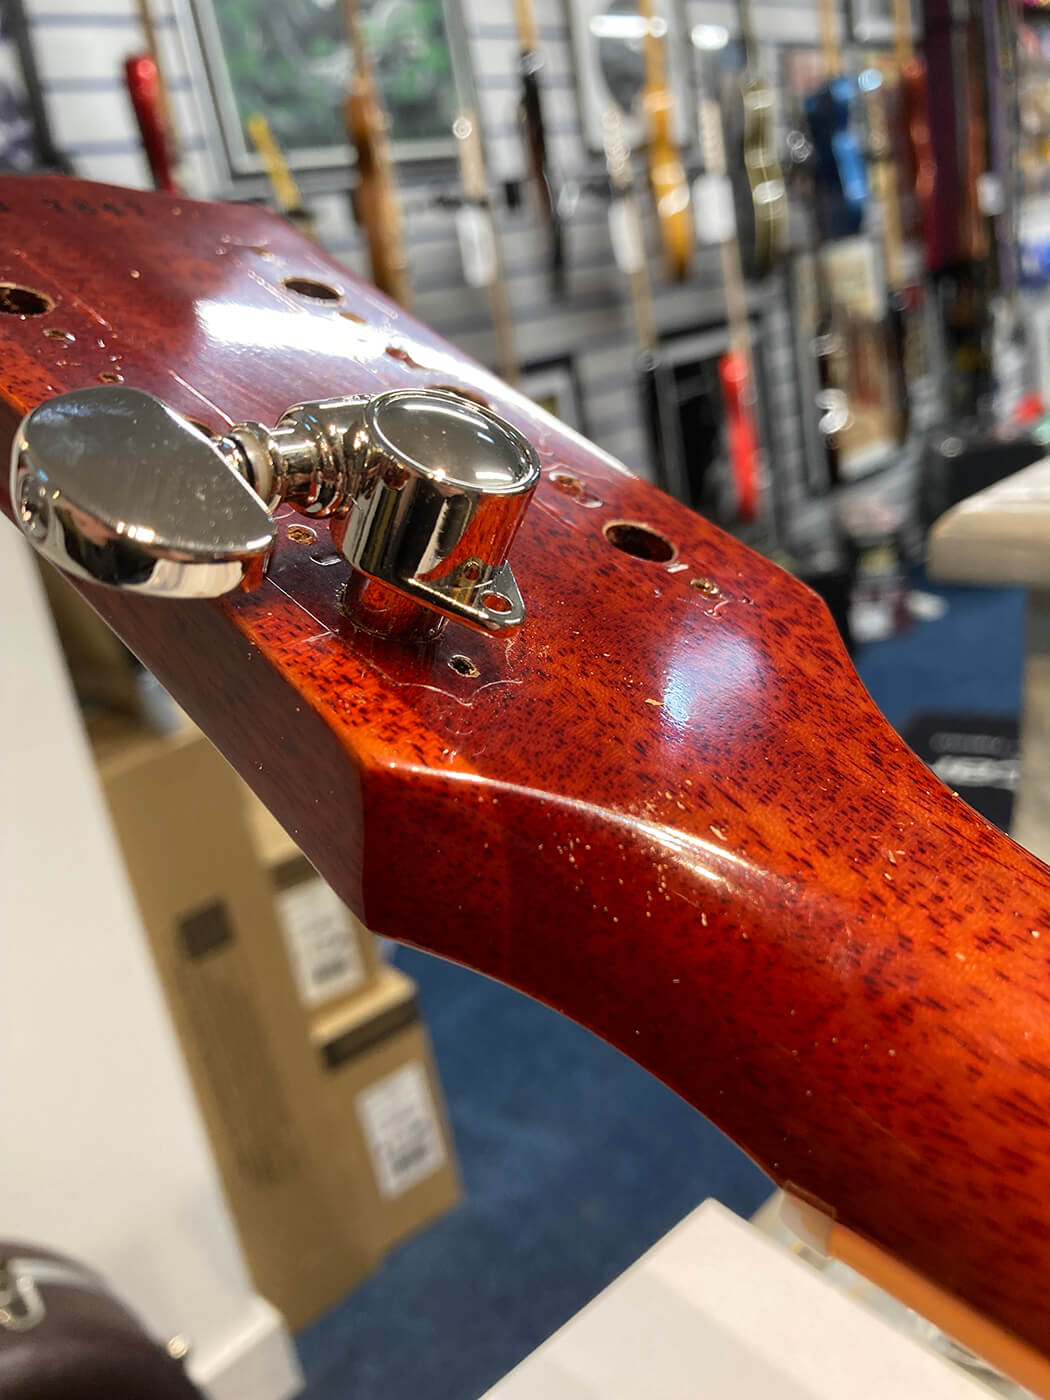
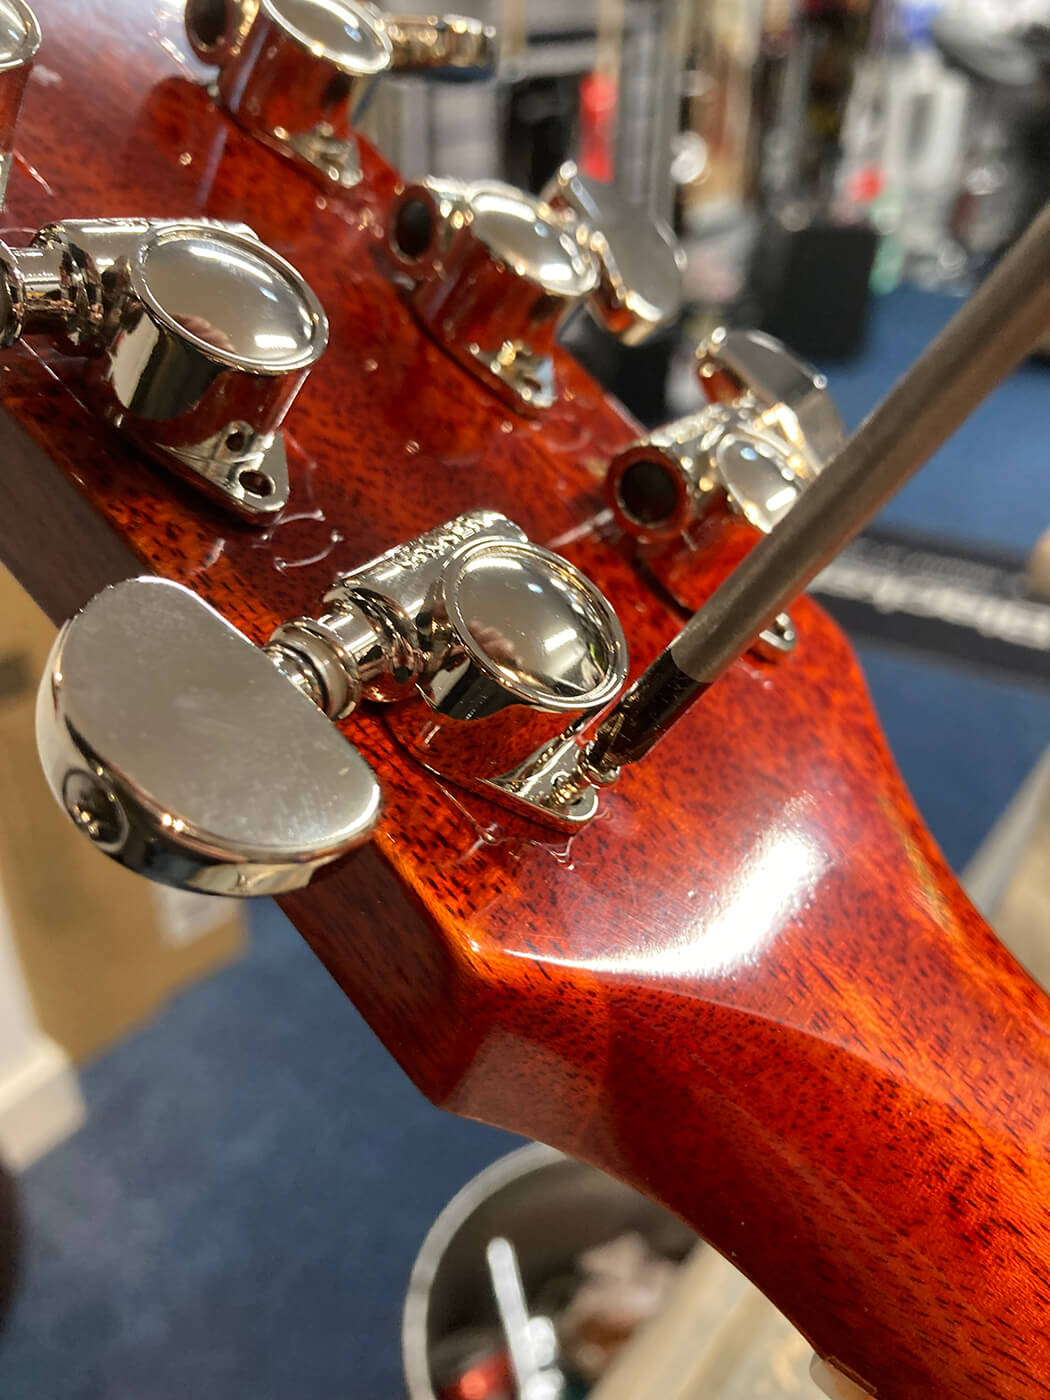
Mount the machineheads to their new locations. If you’ve used Grovers, attach the washer and the locking nut on the front of the headstock by finger-tightening them, which should allow you to correctly locate them on the back.
On the back of the headstock, in most cases, you can use the existing hole, as displayed here. You may need to get a small hand drill set with small bits to match your screws. It’s not the end of the world. Fear not, they’re pretty cheap.
If you have to redrill the holes, do not use a power drill. Do it by hand and measure the screw thread against your drill bit, and add tape as a marker to ensure you don’t drill through your headstock. Believe me, it’s the worst.
Position the new tuner so that it is parallel with the edge of the headstock. This can be problematic if your headstock is curved. In these instances, place all the tuners so that they look right to your eyes then mark out where the screw will go, then gently drill with your newly acquired drill bit set.
Once all the screws are in, carefully tighten the nuts on the front of the headstock. Do not use pliers. I recommend using the MusicNomad wrench for this part as it has a soft back that should ensure your beautiful headstock remains undamaged by any slippages.
Reach for and re-attach the hardware you removed earlier, and string up your guitar. Now you can enjoy the fruits of your labour by being in tune and letting your guitar sing again.
Remember, patience is key.
Also, for those that feel that the guitar is devalued by the addition of Grovers, I’ve saved the bag of shavings to sell with the guitar should we ever part ways…
For more guides, click here.